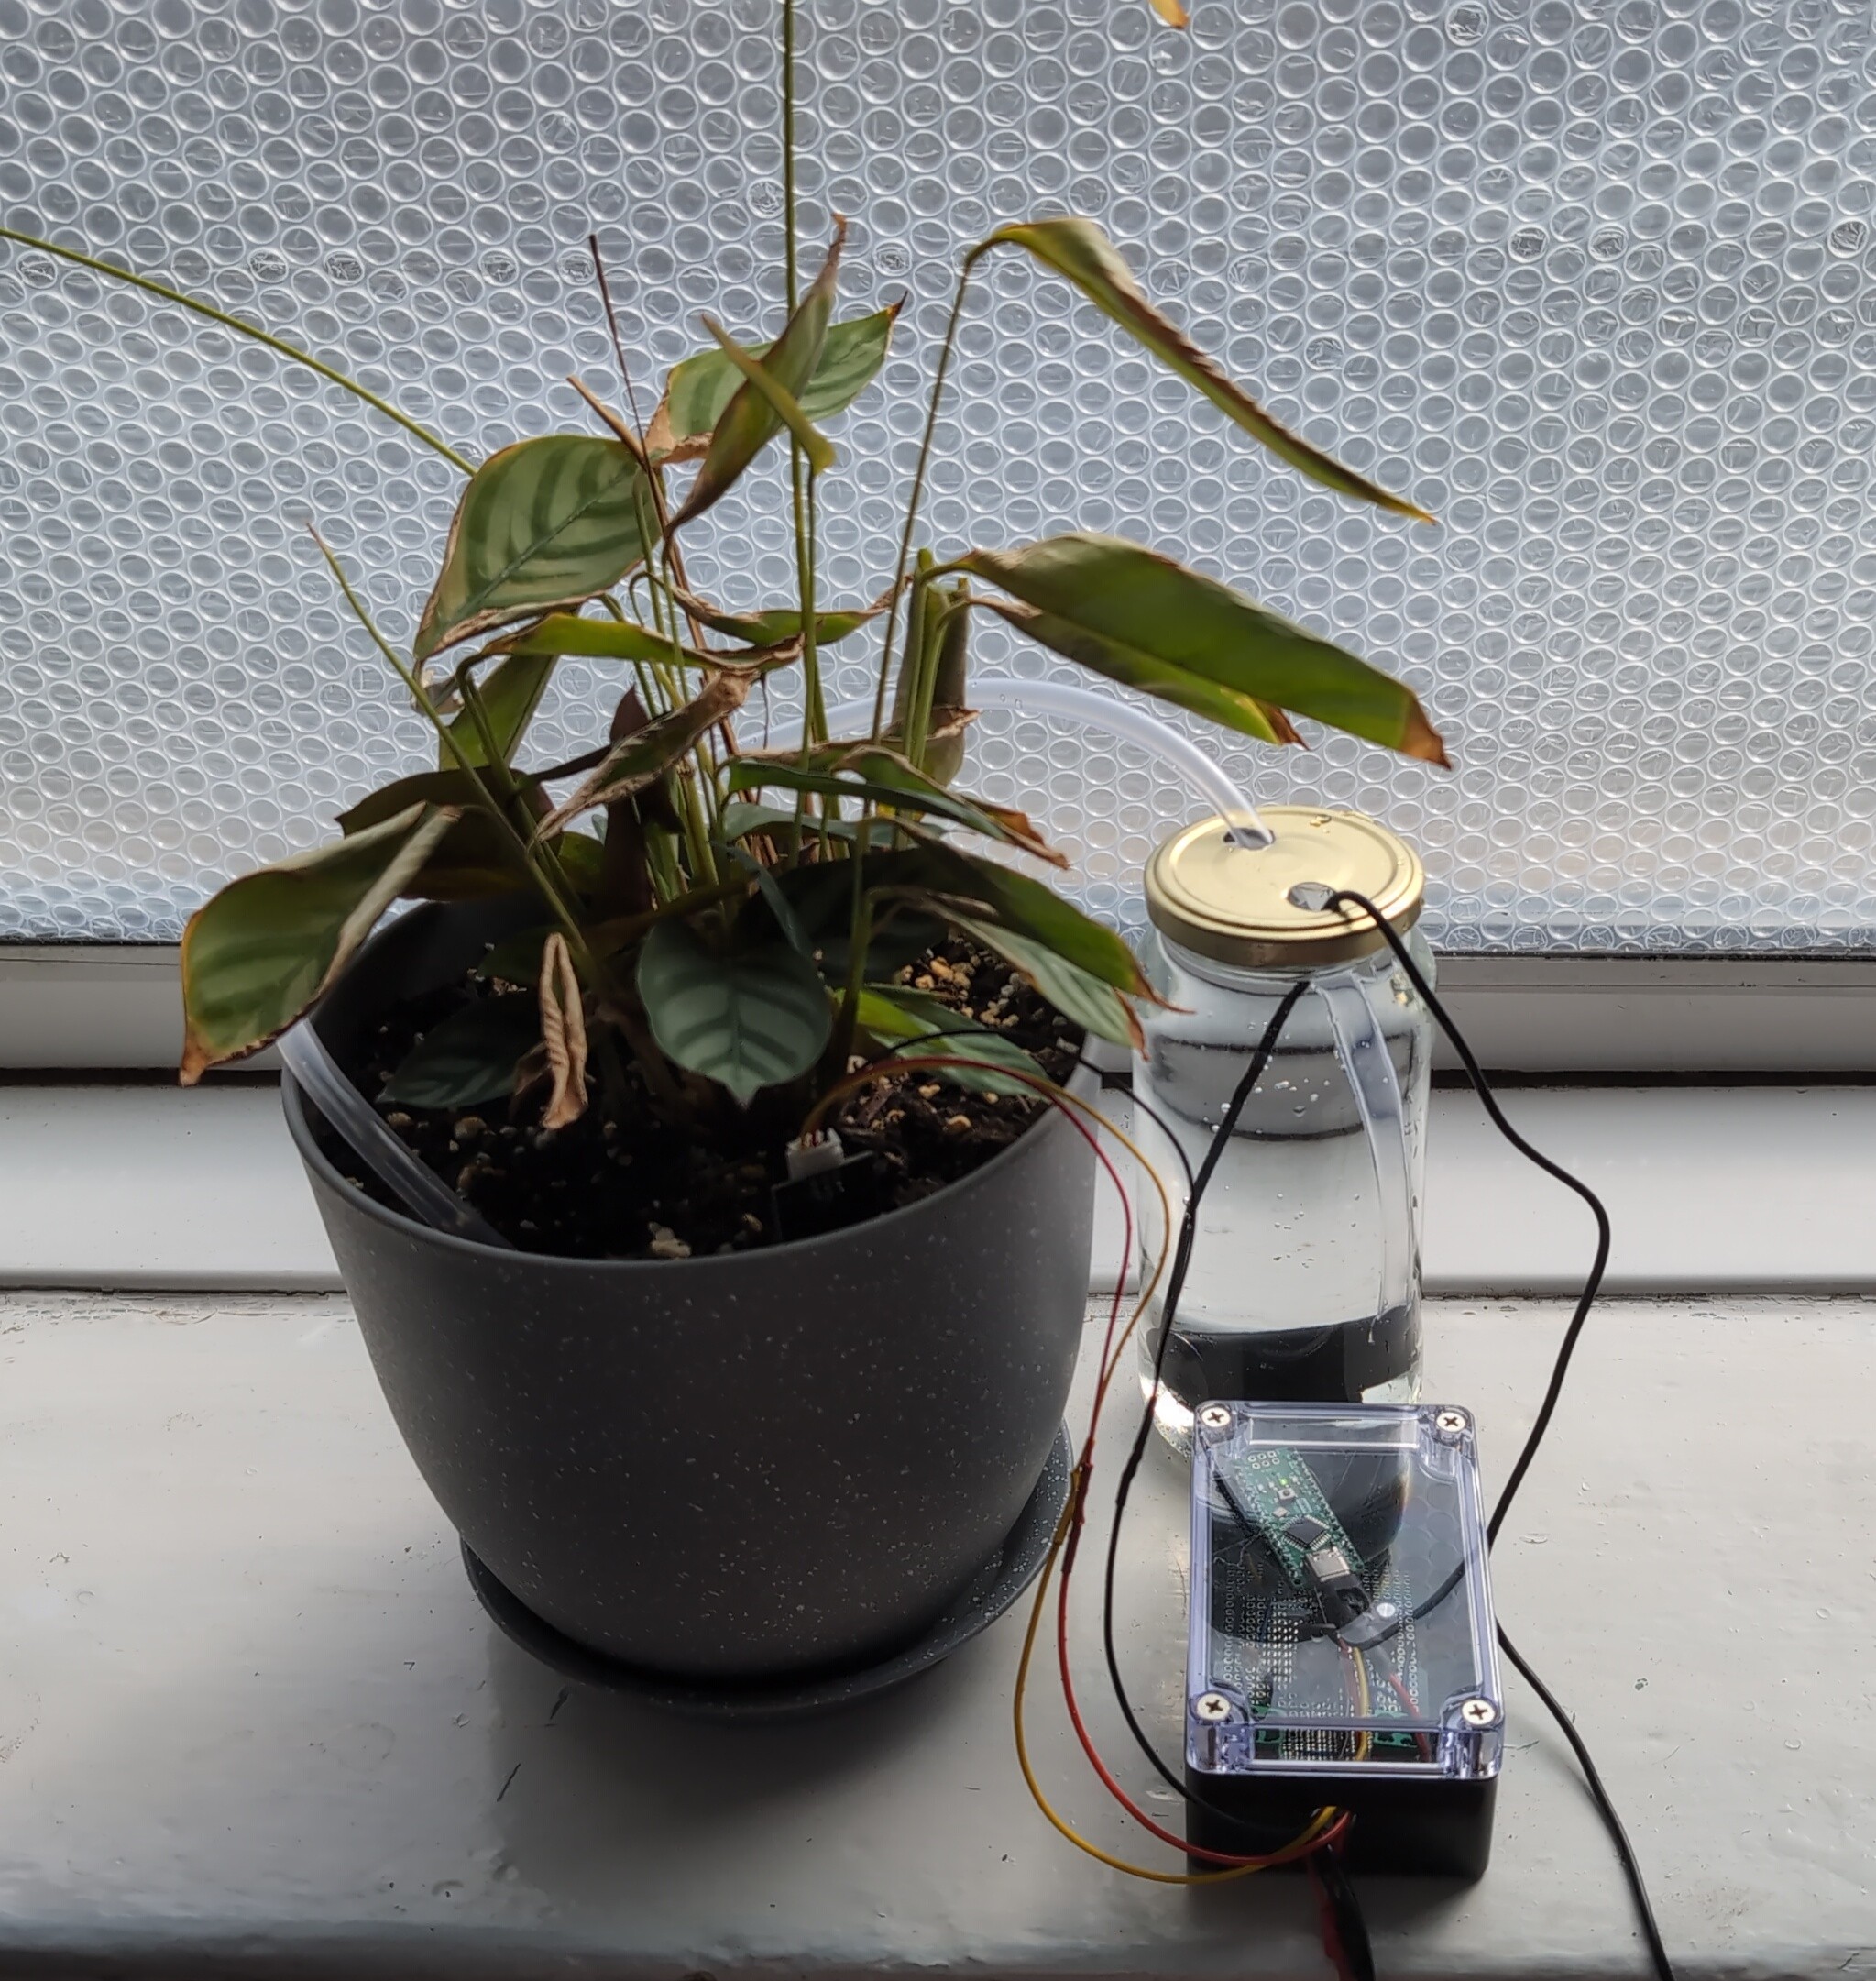
Automatic Plant Watering System
I built an automatic plant watering system using a moisture sensor, an aquarium pump, and an Arduino Nano.
The Moisture Sensor
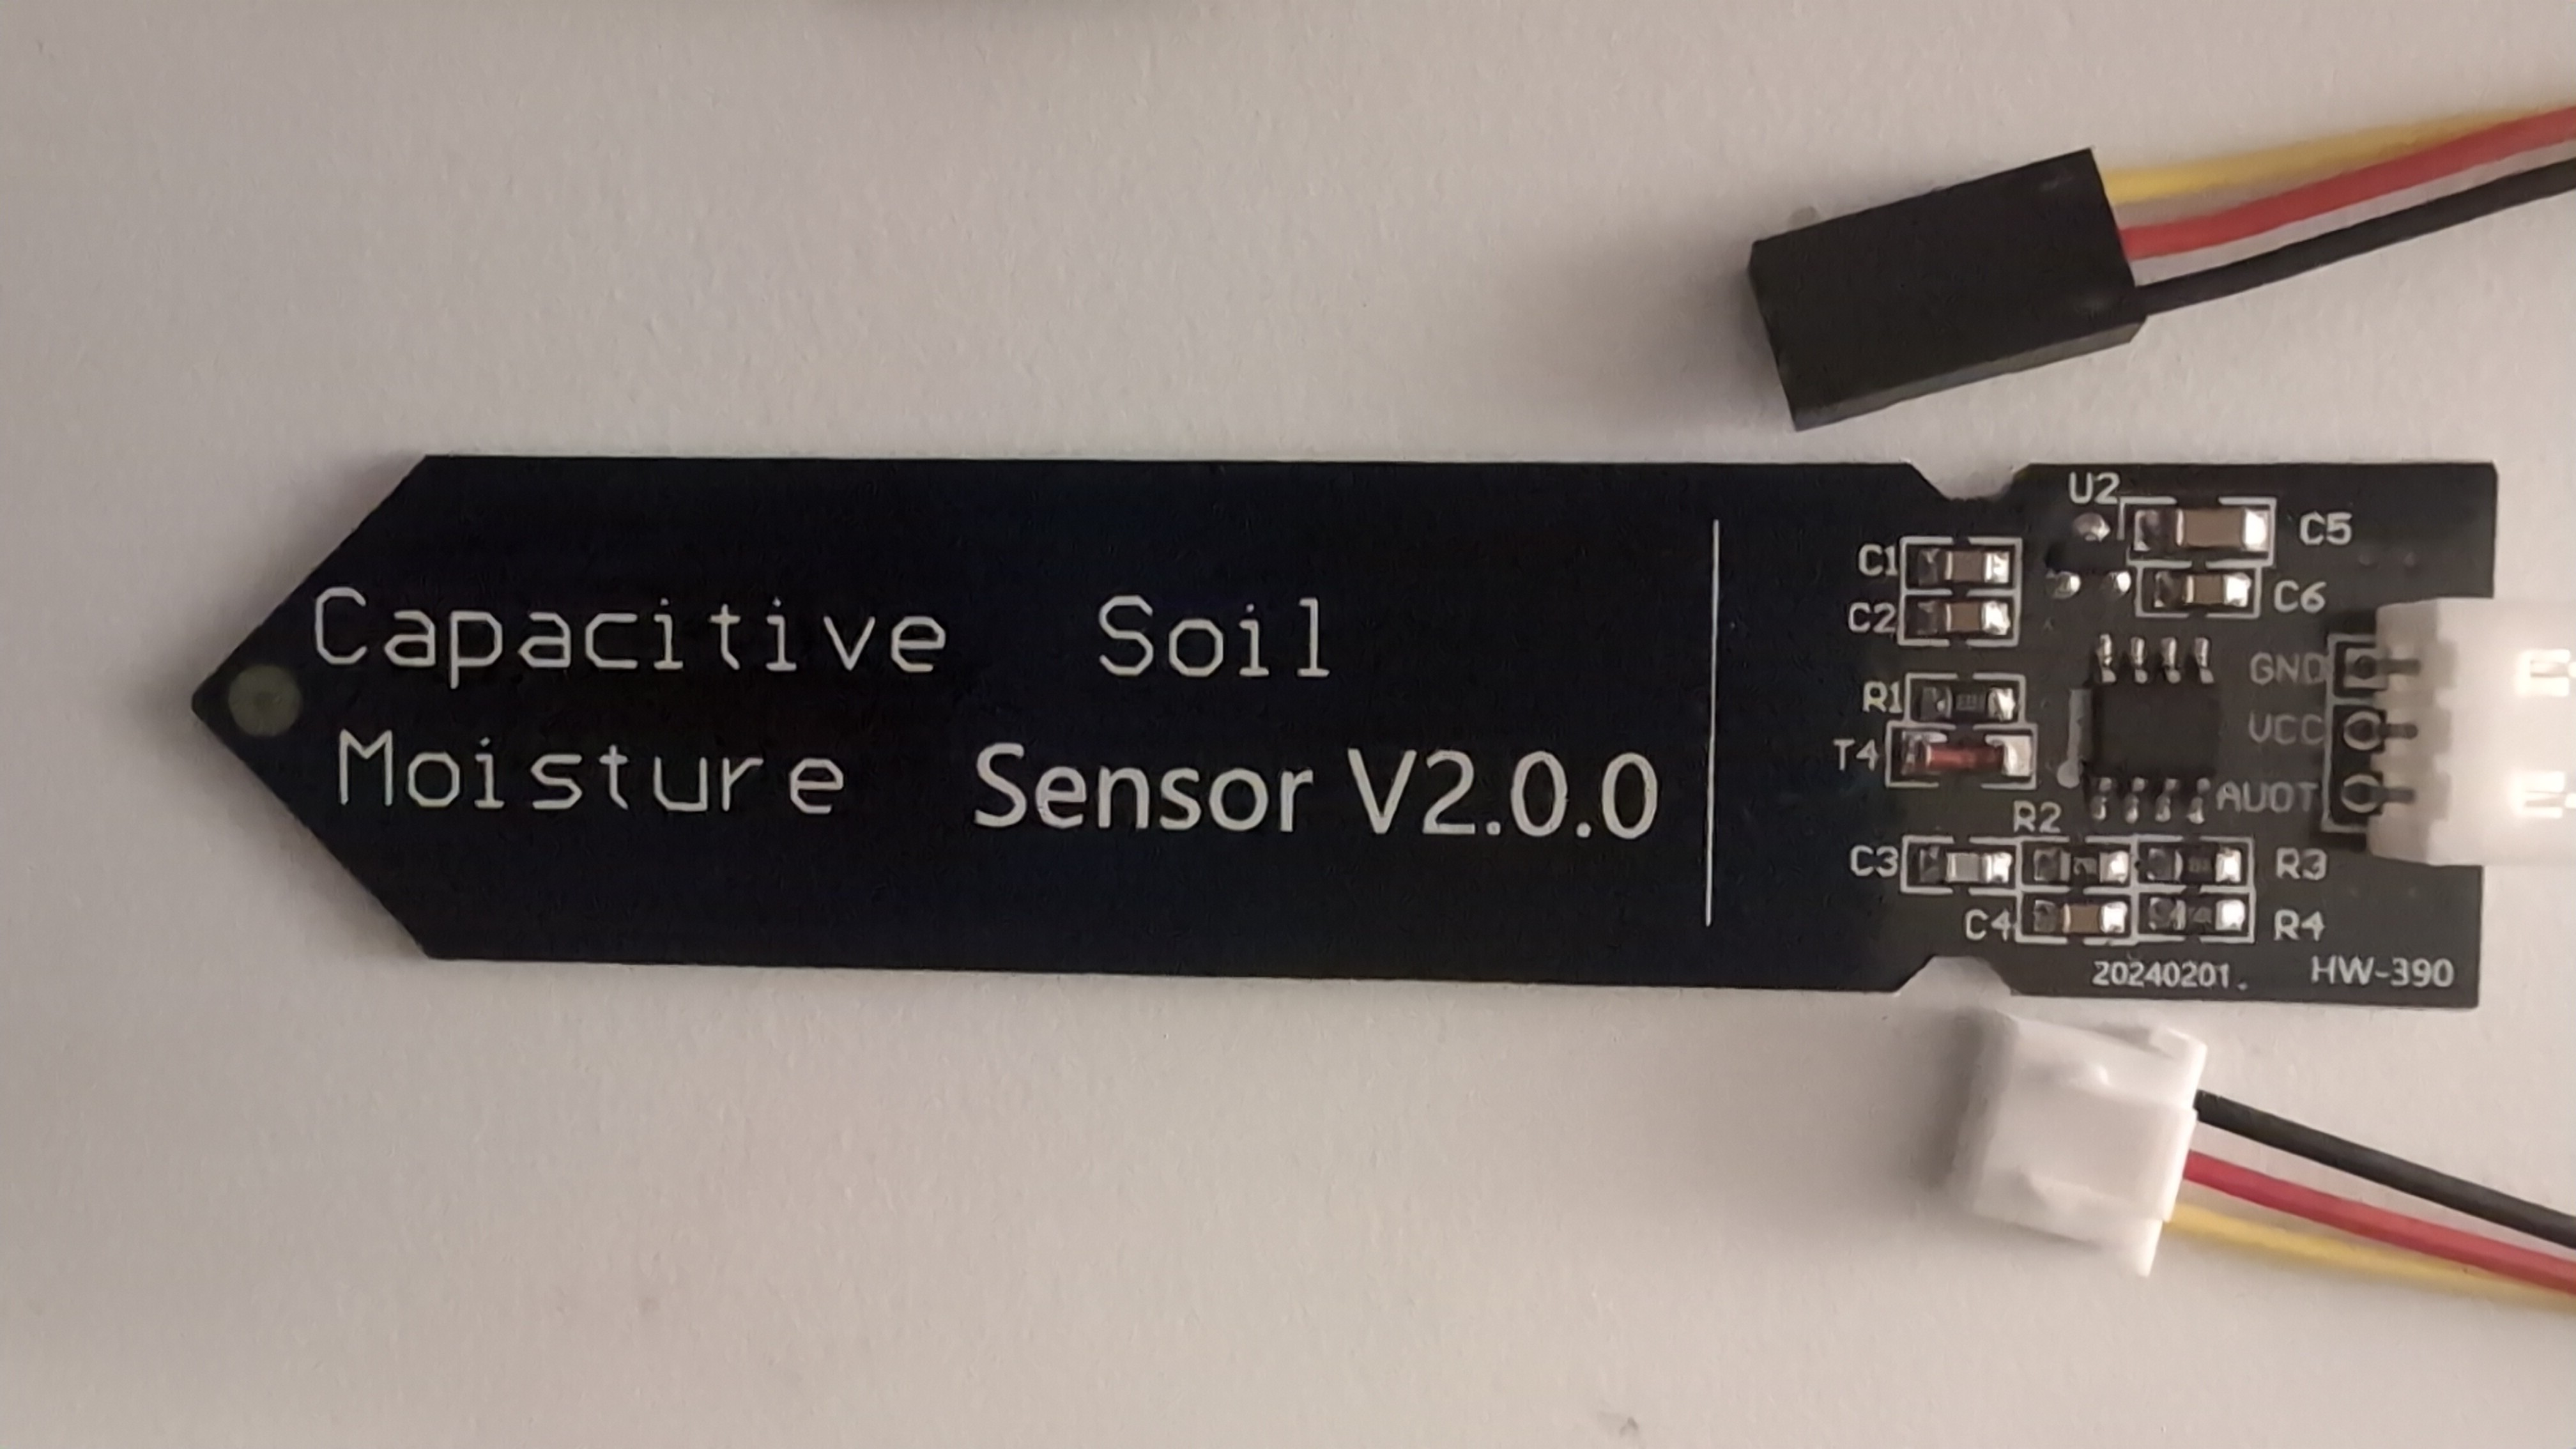
Capacitive moisture sensor
I used a capacitive soil moisture sensor connected to an Arduino Nano. The sensor has three wires: 5V, ground, and signal. The wires weren’t long enough to reach into the pot, so I extended them by splicing.
The sensor doesn’t simply report ‘wet’ or ‘dry’. It produces an analogue voltage, which the Arduino Nano code can read
using analogRead(). This gives a number between 0 and 1023, not a moisture percentage.
Hooking the sensor up to the 5V, GND, and A0 pins on the Arduino, I logged:
- 580 in the air;
- 405 in slightly dry soil;
- 310 in slightly over-watered soil.
Building the Pump Controller
This was an entry-level electrical engineering project for me to learn some new skills, so I designed and built a controller for the pump myself.
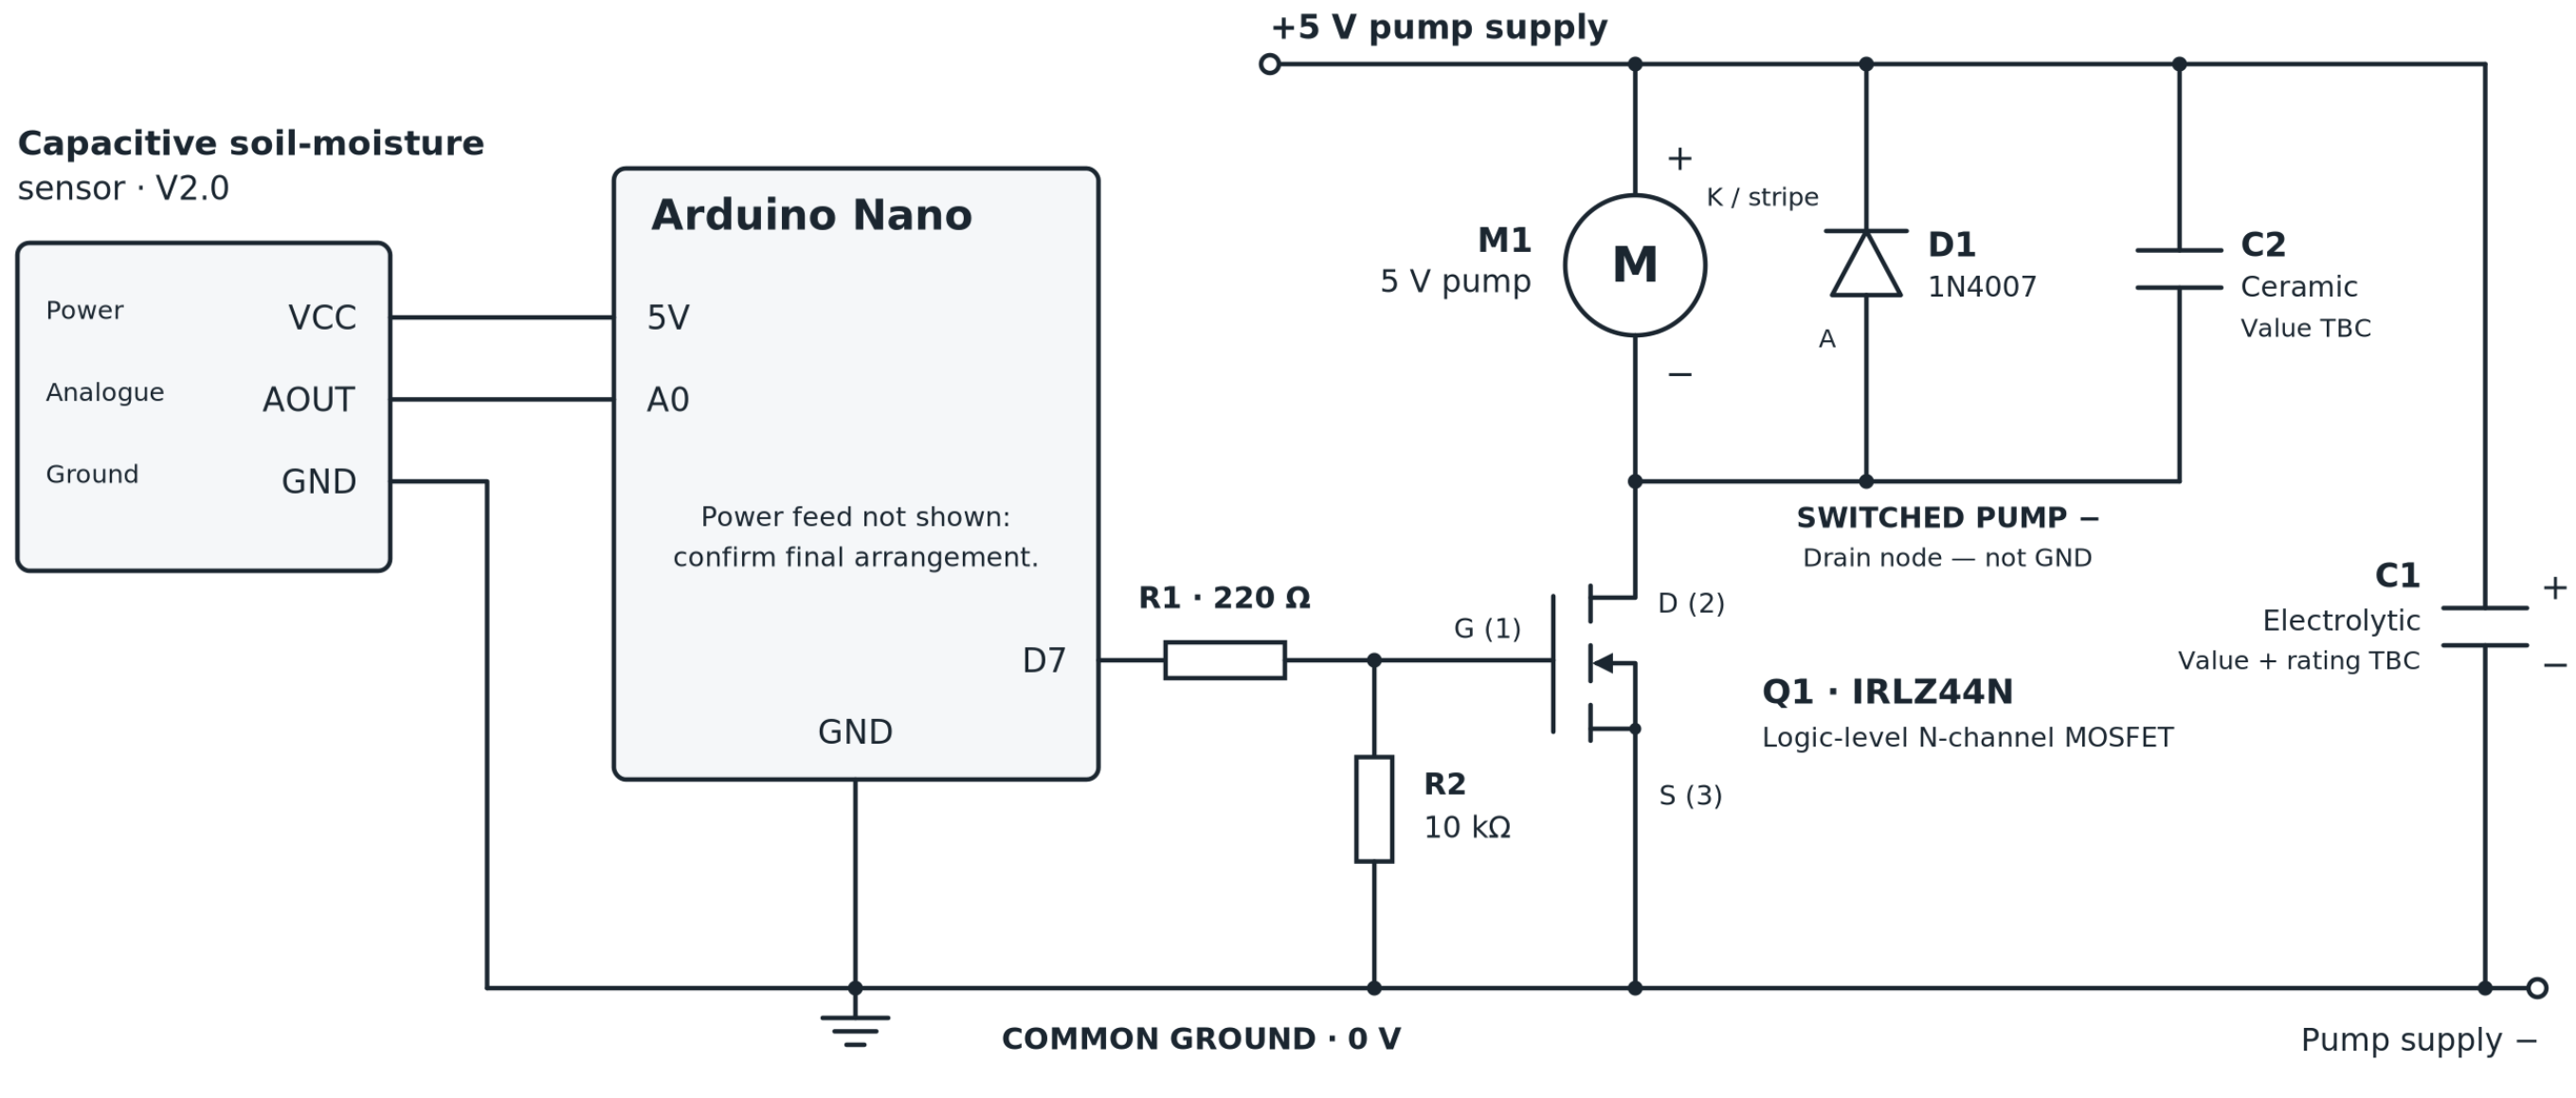
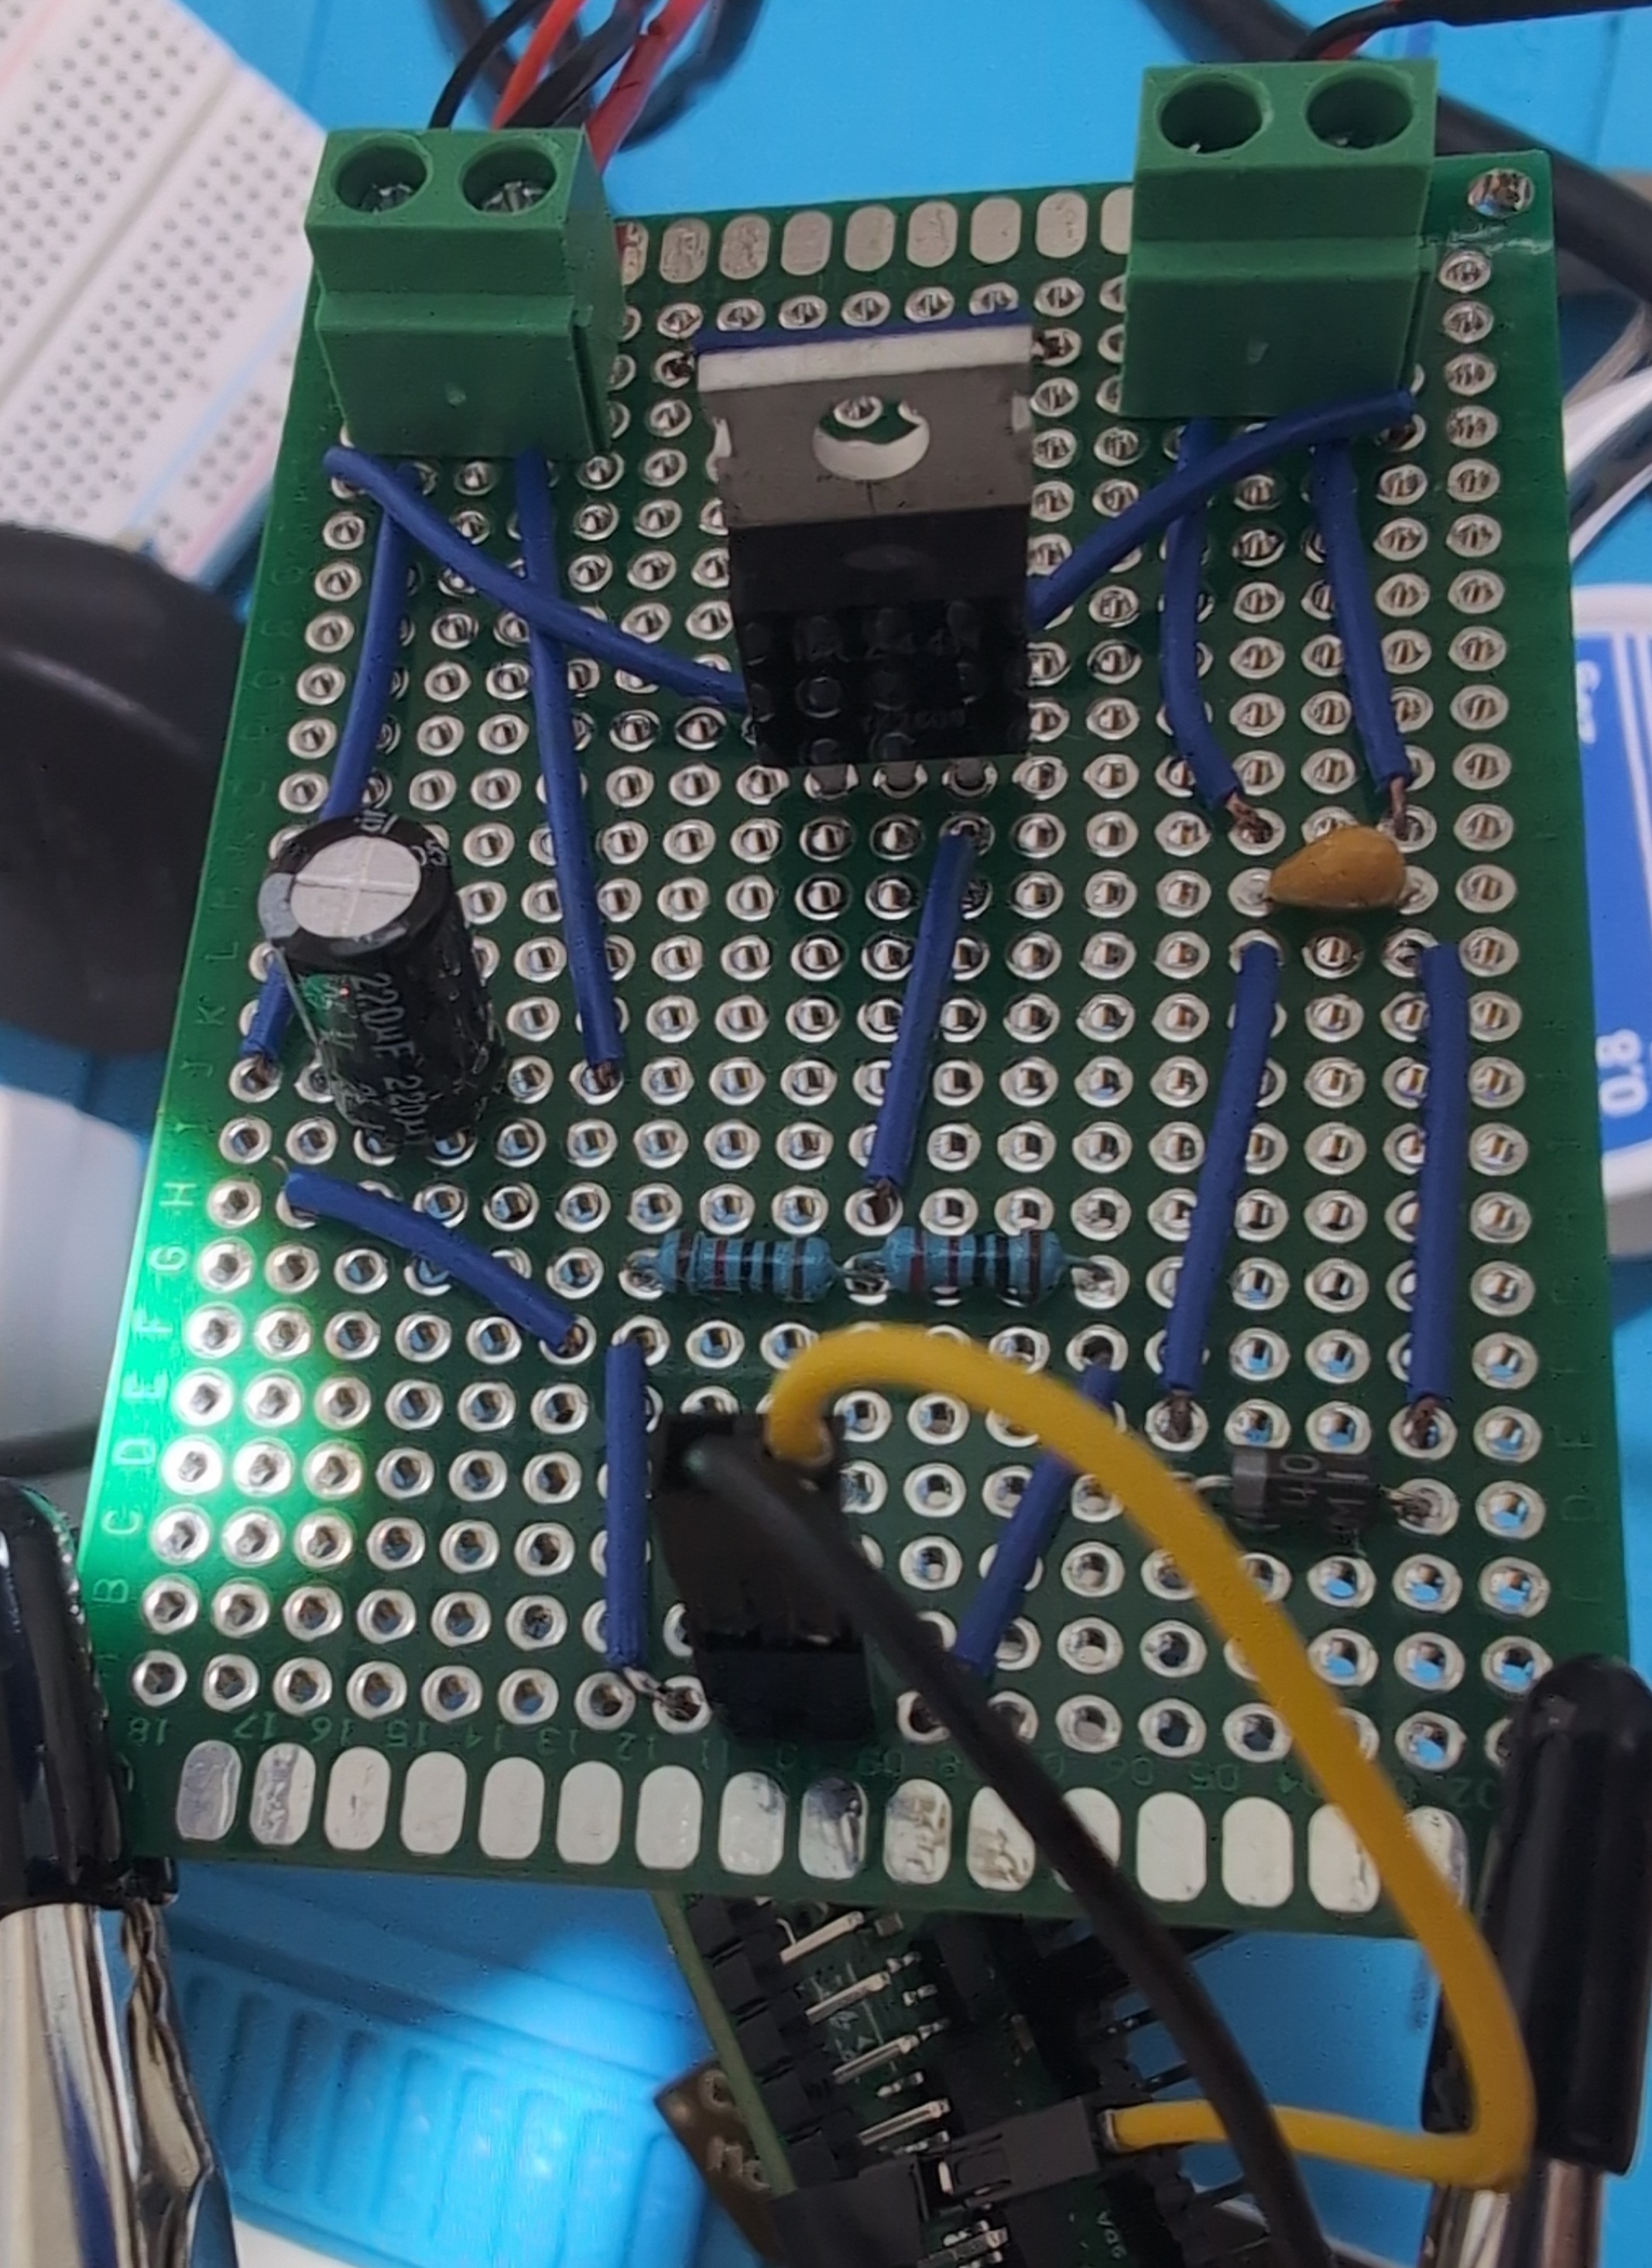
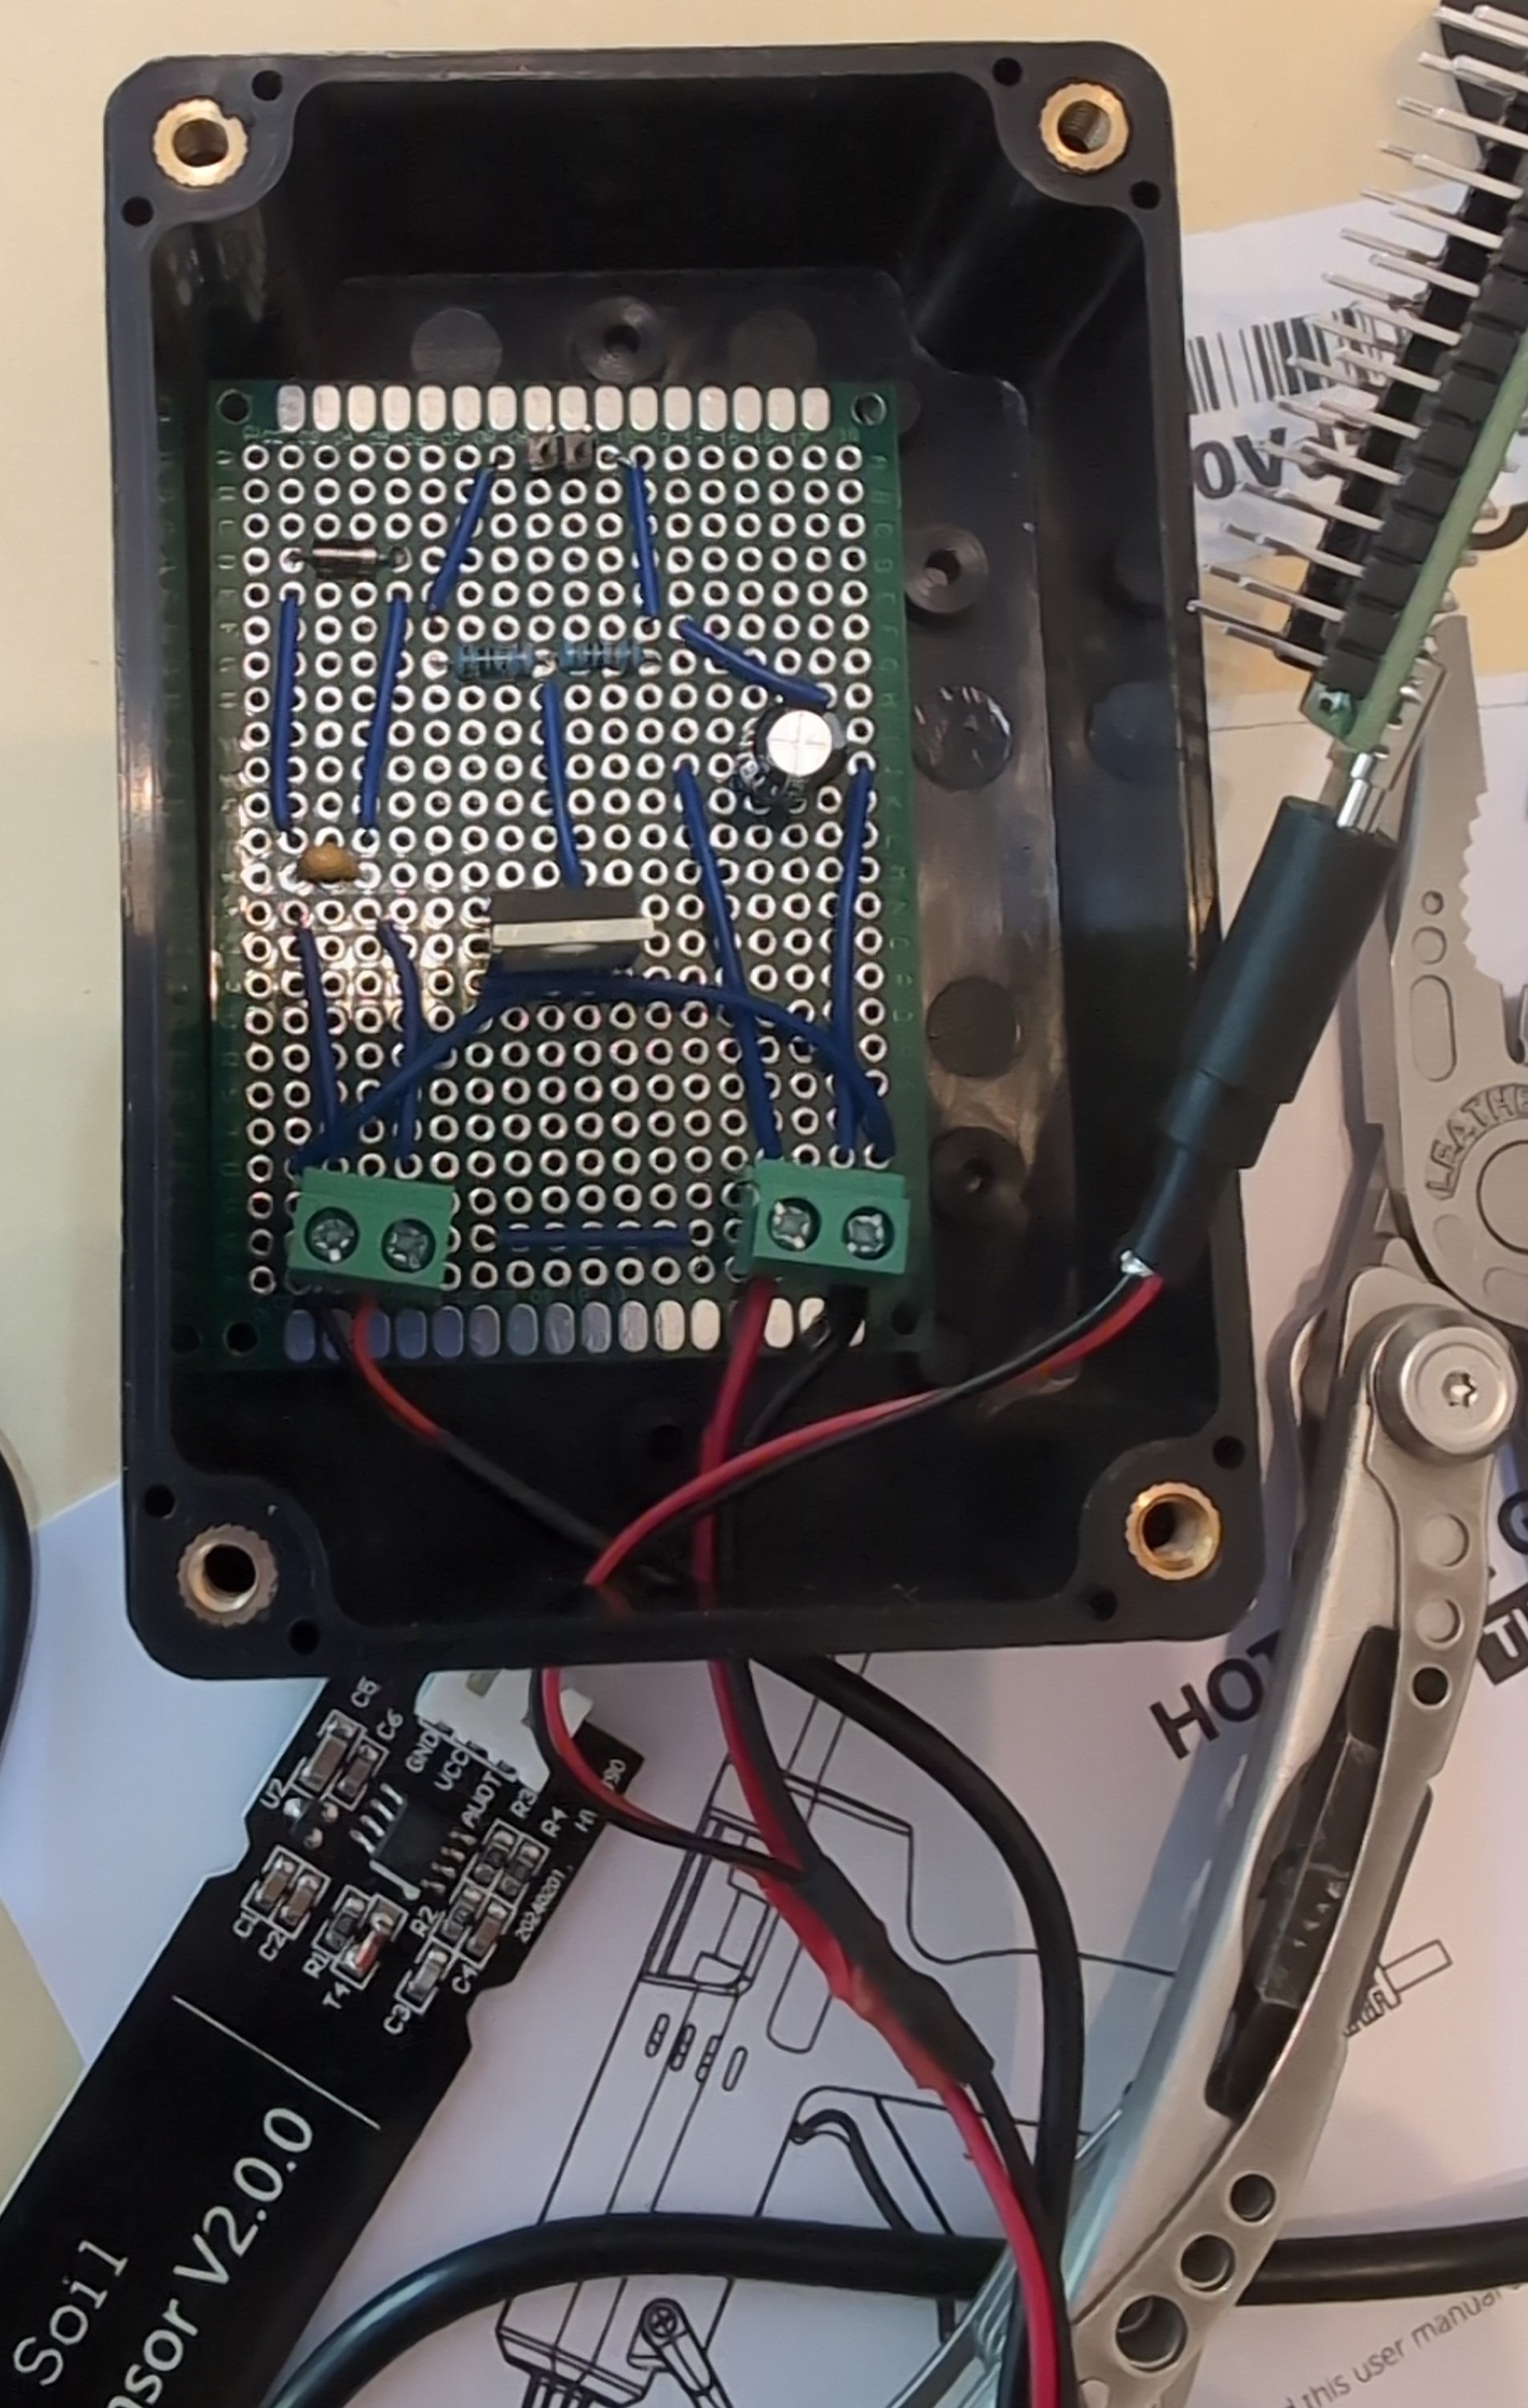
Pump controller for automatic plant watering system
The Arduino Nano supplies the pump’s signal, but its current comes in through a USB-C cable.
An IRLZ44N logic-level N-channel MOSFET acts as the switch. It sits between the pump’s negative connection and ground.
The pump’s positive connection goes directly to the positive supply, while the MOSFET completes or interrupts its return
path. This arrangement is called low-side switching.
There is also a flyback diode to provide protection against the voltage transient when the motor is switched off, and a ceramic capacitor to suppress noise when the pump is running. An electrolytic capacitor sits across the power supply to smooth brief disturbances when the pump first comes on.
Incorrect Installation of the MOSFET
An early version of the pump controller wasn’t working. It took a lot of effort to figure out why, but it turned out I had the MOSFET installed backwards on the control board. By the time this was identified, the part was also damaged. In the end, a new perfboard was used to build the controller again. This time, I put the wires on top of the board, as pictured, rather than underneath. This made it much easier to read and debug.
Measuring the Pump
Running a test command through the Arduino Nano, I was able to run the pump for two 5-second bursts. This put 300ml of water into a measuring jug. Some air would have been pumped through the tubing as well, but I decided that 30ml/s was a close enough approximation of the throughput. The desired water volume per watering is 100ml, so the system runs the pump for 3.33 seconds when required.
Coding the Arduino Nano
Specifying the Schedule
I put the various decisions that had been made about throughput, watering volume, etc. into constants at the top of the code:
// Interpreting moisture sensor reading:
// Higher reading = drier soil.
// 580 in air, 405 in slightly dry soil, 310 a bit over-watered
const int MOISTURE_THRESHOLD = 390;

// Moisture reading averaging:
// Take several readings to reduce noise from the analogue sensor
const int MOISTURE_SAMPLES = 5;
const unsigned long MOISTURE_SAMPLE_DELAY_MS = 200;

// Water throughput and volume:
// 100ml is a small watering
// Recorded ~30ml/s flow rate for pump
const unsigned long WATER_DOSE_ML = 100;
const unsigned long PUMP_FLOW_ML_PER_SEC = 30;

// Lockout time:
// Only act once per hour. Water needs time to diffuse through soil to register
const unsigned long LOCKOUT_MINUTES = 60;
This includes the idea that the pump should only be able to run once per hour. The water takes a while to diffuse through the soil and be detectable. I don’t want the plant to be over-watered in the meantime.
The definitive moisture reading will be an average of 5 readings, each taken 2 seconds apart.
Pin Layout
It is necessary to specify which pins of the Arduino Nano are being used. These were my pins:
const int MOISTURE_PIN = A0;
const int PUMP_PIN = 7;
Averaging Moisture Readings
The average of five moisture readings is calculated like this:
int readMoisture() {
  long total = 0;

  for (int i = 0; i < MOISTURE_SAMPLES; i++) {
    total += analogRead(MOISTURE_PIN);
    delay(MOISTURE_SAMPLE_DELAY_MS);
  }

  return total / MOISTURE_SAMPLES;
}
Monitoring the Situation
That just leaves the main loop, which reads the average moisture level. If it’s been more than an hour since the last watering and the soil is dry, the pump runs for 3.33 seconds. This should put 100 mL of water into the plant pot.
void loop() {
  int moisture = readMoisture();

  Serial.print("Moisture: ");
  Serial.println(moisture);

  bool lockoutFinished =
      !hasWatered || (millis() - lastWateredAt >= LOCKOUT_MS);

  if (moisture > MOISTURE_THRESHOLD && lockoutFinished) {
    Serial.println("Soil is dry. Watering...");

    digitalWrite(PUMP_PIN, HIGH);
    delay(PUMP_RUNTIME_MS);
    digitalWrite(PUMP_PIN, LOW);

    lastWateredAt = millis();
    hasWatered = true;

    Serial.println("100 mL watering complete.");
    Serial.println("Starting 60 minute lockout.");
  }

  delay(5000);  // Wait 5 seconds before the next averaged reading
}
Full Codebase
You can see the full codebase in my GitHub repo for the plant watering system.
Enclosure and Deployment
Pump controller for automatic plant watering system
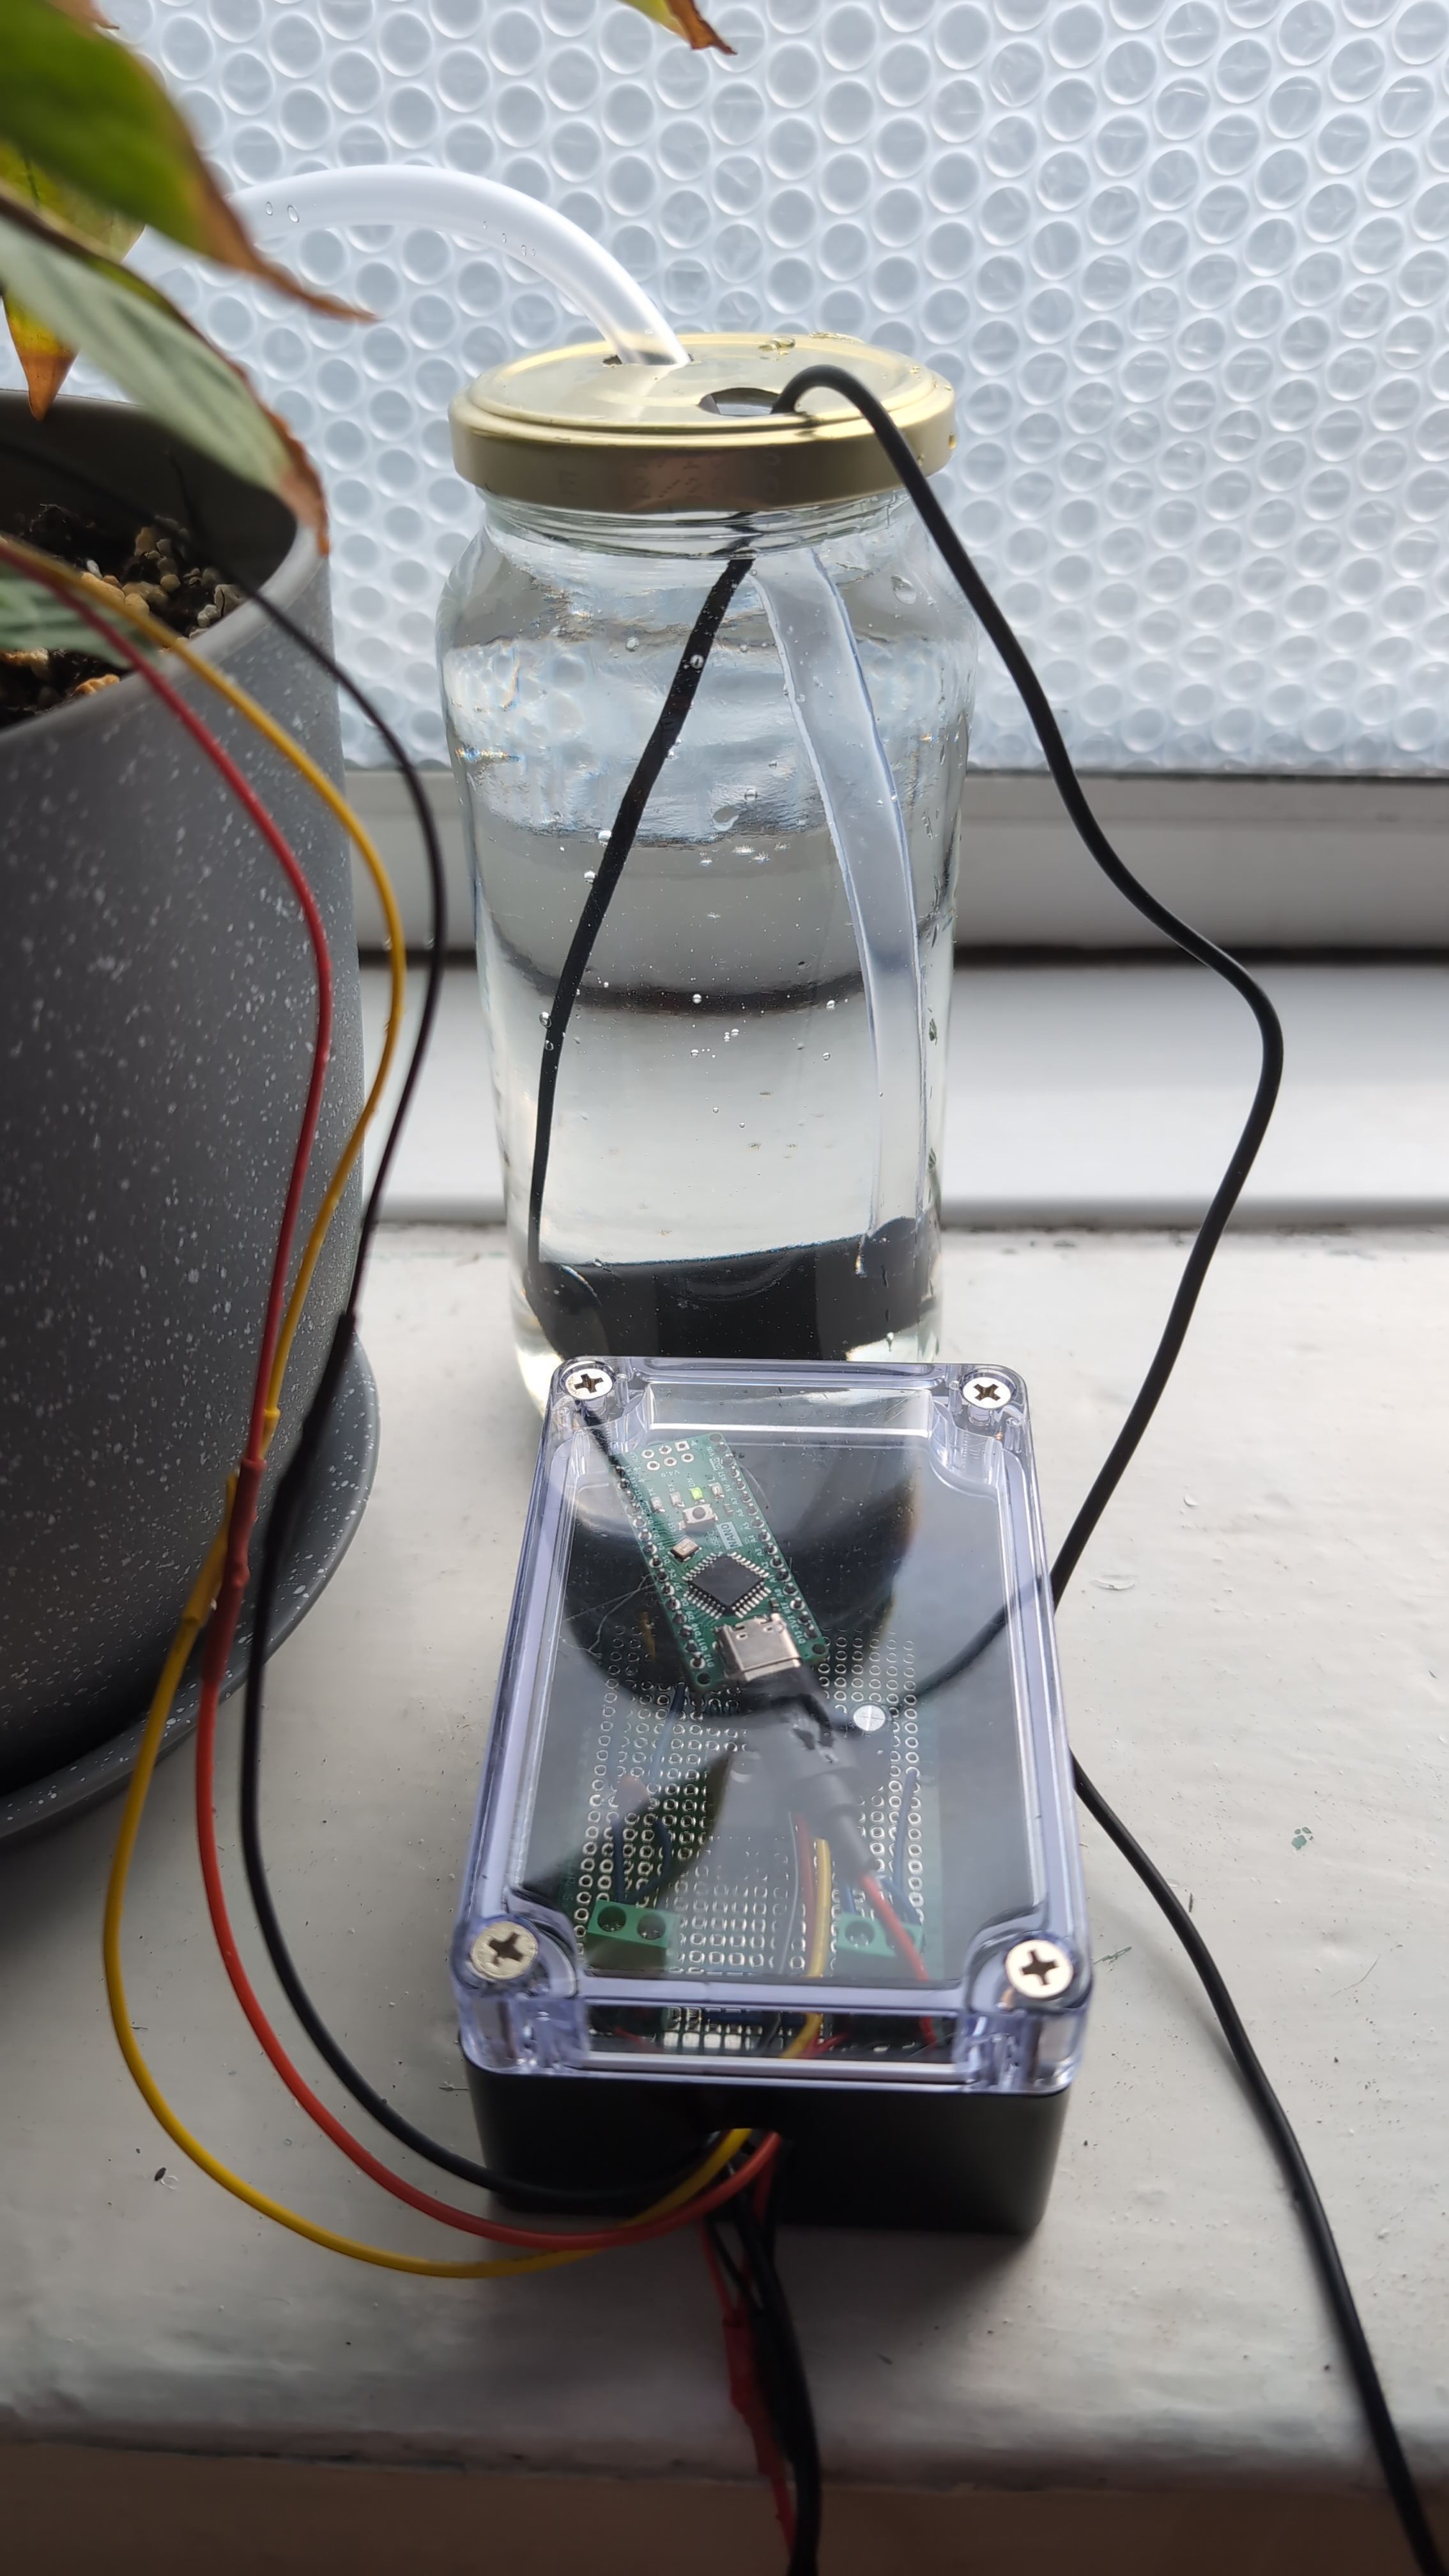
I used a plastic project box to contain the Arduino Nano and my pump controller. The box was waterproof when bought, but I drilled a hole in it for the wires to come in. The arrangement was quite awkward, and the Arduino ended up having to be glued to the inside of the lid. The project box provides a splash-proof container so I don’t spill water on the electronics while refilling the reservoir.
Pump controller for automatic plant watering system
The pump lives at the bottom of a jar of water. The capacity of the jar is only 1/4 litre, so the system can’t go too crazy and flood the house. I’ll get a bigger jar now I know it is behaving as expected.
Summary
This was a fun project and a good excuse to learn more about electrical engineering. There are some other things I want to make that will be harder, but the automatic plant watering system was a fantastic learning experience. Now I can do more conference talks without my plant dying.