Training an Image Classification Model with EfficientNet
The goal of this project is to classify all the images I had from previous phones, cloud backups etc. The project will be a local web application that acts as a photo album, with EfficientNet/TensorFlow running locally to do image classification. There are 15k images, and I can classify them locally on an RTX 3060 GPU.
In the previous post, I detailed how I used EfficientNet to perform image classification for inference tasks. The ultimate goal of this project is to categorise and organise my entire photo collection automatically, making it easier to locate specific images. As part of this journey, I’ve taken a step further: training my own image classification model using the popular ‘Cats vs. Dogs’ dataset. This post documents the process from preparing the dataset to achieving an accurate model for inference.
Why Train Your Own Model?
While pre-trained models are powerful, they may not align perfectly with your specific dataset or task. Training a model allows you to:
- Tailor the model to your unique dataset.
- Improve accuracy by fine-tuning for domain-specific features.
- Gain experience in model training and deployment workflows.
EfficientNet, known for its computational efficiency and high accuracy, is a suitable base model for this purpose.
Step 1: Dataset Preparation
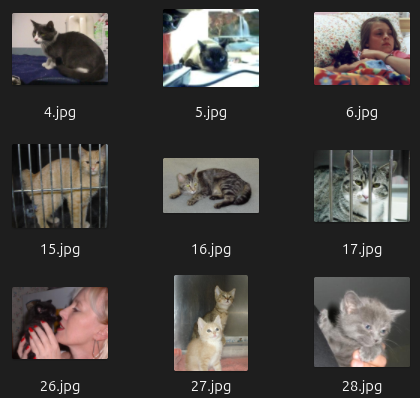
The dataset I used is the ‘Cats vs. Dogs’ dataset, which contains images of cats and dogs labeled into two classes. After downloading the dataset, I:
- Extracted the images.
- Organised them into directories structured for training and validation:
cats_vs_dogs/
    train/
        cats/
            0.jpg
            1.jpg
            ...
        dogs/
            0.jpg
            1.jpg
            ...
    val/
        cats/
            10000.jpg
            ...
        dogs/
            10000.jpg
            ...
Overall, there were 10,000 images of each animal in the training set, and 2,500 images of each in the validation set.
Preprocessing the Data
To ensure that the dataset was clean and ready for training, I wrote a script to validate and filter out malformed images:
import os
import tensorflow as tf

def check_image_validity(image_path):
    try:
        img = tf.io.read_file(image_path)
        decoded_img = tf.image.decode_image(img)
        if decoded_img.shape[-1] not in [1, 3, 4]:
            print(f"Invalid image: {image_path}")
            return False
        return True
    except Exception as e:
        print(f"Error with image {image_path}: {e}")
        return False

# Validate images in the dataset
base_dir = '/[path]/cats_vs_dogs'
for root, dirs, files in os.walk(base_dir):
    for file in files:
        file_path = os.path.join(root, file)
        if not check_image_validity(file_path):
            os.remove(file_path)
Step 2: Loading and Augmenting the Dataset
Using TensorFlow’s image_dataset_from_directory, I loaded the dataset and applied preprocessing. Data augmentation,
such as flipping and rotation, was included to improve generalization.
import tensorflow as tf

train_dir = '/[path]/cats_vs_dogs/train'
val_dir = '/[path]/cats_vs_dogs/val'

batch_size = 32
img_size = (224, 224)

train_dataset = tf.keras.preprocessing.image_dataset_from_directory(
    train_dir, image_size=img_size, batch_size=batch_size)

val_dataset = tf.keras.preprocessing.image_dataset_from_directory(
    val_dir, image_size=img_size, batch_size=batch_size)

# Data augmentation
data_augmentation = tf.keras.Sequential([
    tf.keras.layers.RandomFlip('horizontal'),
    tf.keras.layers.RandomRotation(0.2),
])

def preprocess(images, labels):
    images = tf.keras.applications.efficientnet.preprocess_input(images)
    return images, labels

train_dataset = train_dataset.map(preprocess)
val_dataset = val_dataset.map(preprocess)
Step 3: Building the Model
I used EfficientNetB0 as the base model, adding custom layers for binary classification:
from tensorflow.keras.applications import EfficientNetB0
from tensorflow.keras.layers import Dense, Dropout, GlobalAveragePooling2D
from tensorflow.keras.models import Model

base_model = EfficientNetB0(weights='imagenet', include_top=False, input_shape=(224, 224, 3))
base_model.trainable = False  # Freeze base model for transfer learning

x = GlobalAveragePooling2D()(base_model.output)
x = Dropout(0.2)(x)
output = Dense(2, activation='softmax')(x)  # Binary classification

model = Model(inputs=base_model.input, outputs=output)

model.compile(optimizer='adam',
              loss='sparse_categorical_crossentropy',
              metrics=['accuracy'])
Step 4: Training the Model
I trained the model for 10 epochs, monitoring accuracy and loss on both the training and validation datasets:
history = model.fit(
    train_dataset,
    validation_data=val_dataset,
    epochs=10
)
The model achieved a validation accuracy of 99.16% and a validation loss of 0.0223, demonstrating very good performance.
Step 5: Saving and Using the Model
After training, I saved the model in the native Keras format:
model.save('/path/to/models/cats_vs_dogs_model.keras')
To use the model for inference, I wrote the following script:
from tensorflow.keras.models import load_model
from tensorflow.keras.preprocessing import image
import numpy as np

model = load_model('/path/to/models/cats_vs_dogs_model.keras')

img_path = '/path/to/image.jpg'
img = image.load_img(img_path, target_size=(224, 224))
img_array = image.img_to_array(img)
img_array = np.expand_dims(img_array, axis=0)

predictions = model.predict(img_array)
classes = ['cat', 'dog']
print(f"Predicted class: {classes[np.argmax(predictions)]}, Confidence: {np.max(predictions) * 100:.2f}%")
Lessons Learned
- Dataset Quality Matters: Cleaning up malformed or corrupt images is necessary for successful training.
- Transfer Learning Speeds Up Training: Using a pre-trained model like EfficientNet significantly reduces training time and improves accuracy.
- Data Augmentation Improves Generalization: Augmentation techniques help the model handle diverse data.
This project was an enriching experience, providing valuable insights into the end-to-end training process. Next, I plan to use the model to organize my personal photo collection. Stay tuned for updates!
